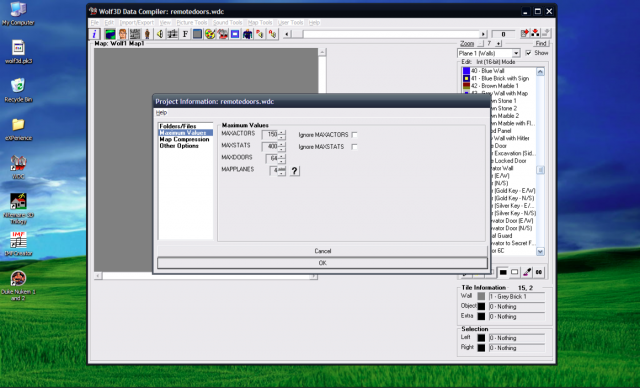
Open up your favorite map editor (I use WDC) and make a new project. Set MAXPLANES to 4 in the Project Information tab
Next, add your map symbols. Either navigate to Map Tools→Map Symbols, or press F9 to bring up the window.
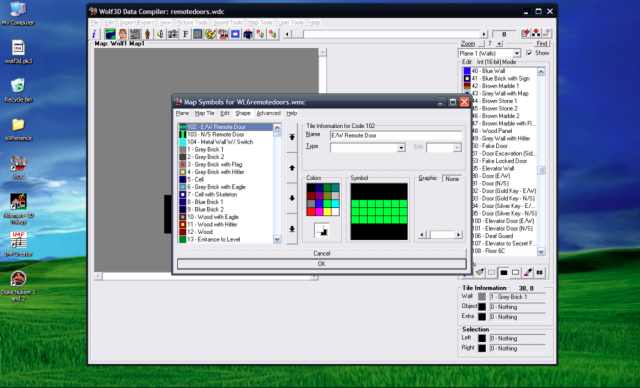
Your Map Symbols will need to match the numbers assigned to the tiles in your XLAT (In this tutorial, they are tile 102, tile 103, and tile 104).
Place the tiles where you want them in the map. Next, you must select Plane 4 and highlight the remote door tile. Select High Byte
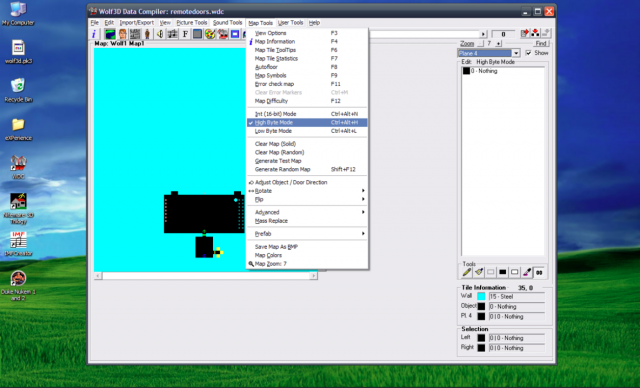
Input the X coordinates in the manual tile input on top of the remote door

Next, select Low Byte mode and input the Y coordinates on top of the remote door tile

SUCCESS!! You now have a switch activated door! This can also be used for push walls, and touch triggers can replace wall triggers as well to have touch plates!
Special thanks to Executor for being the first to implement this, and special special thanks to Sigma64 for helping me figure this out myself lmao.
(NOTE: I accidentally programmed the tiles backwards in the pics lmfao keep that in mind when doing this. 103 is N/S and 102 is E/W)