Creating a new static object

Tested On

Creating a new object to put in your game is a relatively simple thing to do in ECWolf. This guide will show you where to put the object's sprites, and how to script the basic actor to display. You'll even know how to make an animated object with very little effort!

This guide will be building off of Dunkelschwamm's blank PK3, and assumes you already have a basic understanding of the structure of a basic ECWolf project.

This knowledge will translate into a lot of what you do with ECWolf, as almost all game elements are powered by Decorate actors. This includes other static objects, weapons, enemies, among many other things.

The first thing we'll look at adding is the sprite for your object!

Torch Sprite

For this guide, we're going to use this sprite of a torch*. Right click and save it to your computer, then either drag and drop it over your /sprites folder in the project, or go to Archive→Import Files and add the sprite that way.

You will notice that while traditional Wolfenstein 3D requires sprites to be 64x64 in size, and a .bmp file, the torch is of an unconventional size, and a .png file with transparency. ECWolf is very flexible with sizes, and can support multiple image file types.

What you name your sprites is important for how ECWolf handles them. To learn more about why the sprite is named TOR1A0, read this section of the What is in an ECWolf mod? guide.

*Sprite from Nitemare 3D: Hugo's Revenge by AstroCreep, which in turn borrowed it from it's inspiration, NITEMARE 3D by David P. Gray.

Now that we have our sprite,we need to create an actor to use these sprites! This is where we will start utilizing Decorate, a scripting language in ECWolf that allows modders to customize their games without having to modify the source code.

You can learn more about DECORATE in the official ECWolf guide covering it, and explore the ECWolf wiki to learn about all the different things you can do with it.

If you don't already have one, create a decorate.txt in the main directory by going to Archive→New Entry.

decorate.txt

This is the main file for any scripting, and everything we make could go in here. As more and more things are made and added, this file can often get messy and long. Much like with regular programming, Decorate can be split into multiple files, as long as they are referenced appropriately.

So instead of writing our scripting here, we'll create a separate file dedicated to static object actors and link it to decorate.txt with an #include parameter.

First, create a new folder in your main directory called /actors. This is the folder you will keep your extended Decorate files. Then, inside of your actors folder, create a new text file called newstatics.txt.

Once that is done, put the following line in your decorate.txt file:

#include "actors/newstatics.txt"

Now, when ECWolf looks at decorate.txt for scripting, it will also look to the newstatics.txt file.

You can use this method to organize all your future Decorate scripting - grouping enemies, bosses, weapons, and so on so that they can be easily found when you need to change things.

Now that we have the scripting files, it's time to do some scripting! Go into your newstatics.txt file and add the following:

actor NewTorch
{

}

This declares an actor with the name NewTorch, which will be our new object! Inside of these brackets we'll add flags and properties so that ECWolf knows how the actor behaves, and states, which tell it how to display the actor.

You can view a list of Actor Flags on the ECWolf Wiki, as well as Actor Properties.

We want our torch to be solid so the player cannot pass through it, and as such we'll give the actor a SOLID tag, and give it a radius of 32 so the game knows how wide it is:

actor NewTorch
{
    radius 32
    +SOLID
}

So now if ECWolf looks at the NewTorch actor, it will identify it as a solid object. Next, we'll have the actor display our sprite when it is used.

Our NewTorch actor needs to know what sprites to display when it is on the map. To do this, we utilize "states".

States are the animation for an actor (even if it is only one sprite), and these tell ECWolf what to display when, and if any other functions happen at the same time. For Enemy or Weapon actors, there are multiple states to run through. However for static objects, we only need to worry about the Spawn state.

actor NewTorch
{ 
    radius 32
    +SOLID

    states
    {
        Spawn:
            TOR1 A -1
            stop
    }
}

Spawn is a predefined state, and will run when the actor is first created. We put the name of our sprite (In this case, TOR1) as the first frame in the state, and specify that it is frame A. Then, we put a number which represents the number of tics (1/70th of a second) to run a frame before moving to the next. Specifying -1 tells ECWolf to stay on that frame indefinitely.

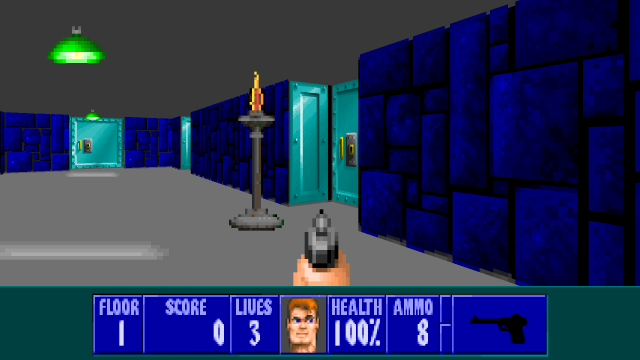
Now that we have the actor for our object defined and completed, we need to add a map definition so that we can start putting it into our maps!

To implement this, you will need to have an XLAT (Map Translator) file. To learn more about what the XLAT can do, AstroCreep has a guide The Anatomy of an XLAT File that is worth reading.

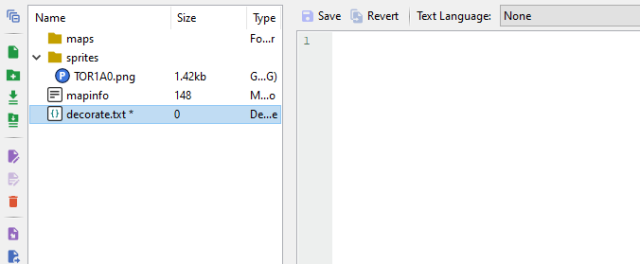
If you don't have an XLAT file yet, create one now. This can be called anything, but xlat.txt is traditionally an easily identifiable name.

We're only adding one object, and plan to use the rest of Wolfenstein 3D's original list. As such, we include this line at the top of the file to "copy" the xlat of our base game:

include "$base"

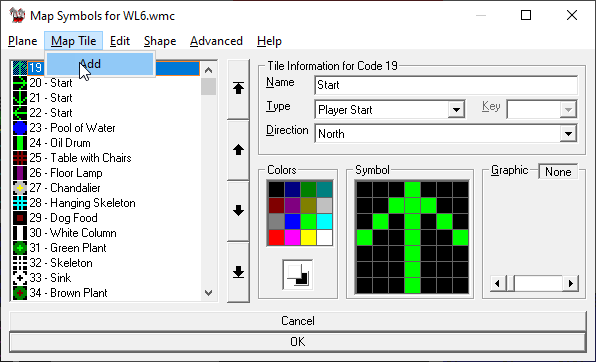
In the XLAT, different elements like Walls, Objects, and Floors/Ceilings (Flats) are declared with their tile values in the map. ECWolf uses this information to work out what has been placed in a map.

Our torch is an actor to be placed in the map, and as such, we'll want to use the things structure.

things
{
    {300, NewTorch, 0, 0, 0}
}

Most actors listed in the things structure follow this pattern:

{ tilenumber, actor, angles, flags, minskill }

So in our above structure, we have linked the tile number 300 to the actor NewTorch. As it's a flat sprite with no extra properties, we leave the other values at 0. If you wanted the column to only show up if the player selects a higher difficulty, you'd set the minskill value according (Difficulty 1 being 0, and Difficulty 4 being 3).

If you haven't already, make sure your XLAT file is declared in the gameinfo structure of your MAPINFO file. If it isn't yet, put the following line in the structure, . If you called it xlat.txt and put it in a folder you created called /xlat, you would put the following:

translator = "xlat/myxlat.txt"

If it is named differently or in a different location, change the value of translator to reflect that.

Now that we have added a tile value for our torch actor, we need to use that tile in WDC.

As it is outside of the scope of this particular guide, this step assumes you already have a basic understanding of Using WDC for your Wolf3D project, and/or have watched Dunkelschwamm's guide for Creating a mapset for ECWolf.

In WDC, go to Map Tools→Map Symbols in the navigation menu. This will bring up all the map symbols available to use in the Map Editor. Go to Plane→Objects/Guards to bring up the Object List, then Map Tile→Add in the new window.

WDC Map Symbols

This will prompt you to enter a number. This number is the same as the tilenumber chosen in the XLAT in the above step (300). Once you have entered it, you will have a new entry in your map list, ready to be named, assigned a "Type" (Object), and a map symbol.

Give it a name (Like "New Torch" or whatever you want), and draw the symbol however you want it to appear on the map. Click OK, and our torch actor will be usable in the map editor!

At this point, we now have a torch actor and a tile for it to be placed on a map. Make a map using it, and see if it works!

Torch actor ingame


You've added your torch successfully, but maybe you think it would look better if the flame were animated. In ECWolf, it's very simple.

First, you need extra sprites of the torch's animation. Download these, and put the sprites into the /sprites folder of your project. Make sure not to change the names. Then, we go to our actor in newstatics.txt

actor NewTorch
{
    radius 32
    +SOLID

    states
    {
        Spawn:
            TOR1 A -1
            stop
    }
}

For each sprite in the animation, we'll want to add a new line with the sprite name, frame, and a time for that sprite to display.

    states
    {
        Spawn:
            TOR1 A 3
            TOR1 B 3
            TOR1 C 3
            TOR1 D 3
            TOR1 E 3
            TOR1 F 3
            TOR1 G 3
            TOR1 H 3
            stop
    }

If you run your game now and look at your object in time, it will be animated. However, it will only go through the animation once and stop. This is because at the end of the animation, we have to tell the actor to loop through the sprites again.

Replace stop with loop and it should now work.

When implementing a basic animation like this, where each sprite works exactly the same and only differs by the frame, we can shorten the states to read as follows:

    states
    {
        Spawn:
            TOR1 ABCDEFGH 3
            loop
    }

This will still scroll through each frame and display each sprite for 3 tics. Both are acceptable methods and work, and it's up to you which you want to use.

Save your changes, and when you go into your game the torch you placed should now have a moving flame!

Animated Torch