Creating a MacenWolf mod

Tested On

MacenWolf is a source port built off of Wolf4SDL, designed to recreate the Mac Wolf3D experience as closely as possible from within Windows. It has since then been used as a base to port the many releases in the Mac Wolf3D community.

If you haven't downloaded it already, you can find MacenWolf on ModDB. Copies of MacenWolf: The Second Encounter and MacenWolf: The Third Encounter come with all the things needed to make a game within a Mac-style environment!

This guide will only take you through the basics - MacenWolf is full of features for modders to do all sorts of things. Your maps could follow the Mac Wolf3D style, or could look like this example from MacenWolf's ModDB:

MacenWolf SUCK

It's up to you how deep you go! If you want more information, more documentation can be found within the MacenWolf game downloads, and be sure to check out the S.U.C.K. modding kit for MacenWolf.

If you are not familiar with WDC, you can download it on itch.io, and read our guide at Start a new WDC project.

To get started, create your new project in WDC by going to File→New Project and give it a name. When you get to the Project Information window, you'll want to fill out the fields thusly:

  1. Base Data Folder This needs to point to the root directory of your copy of Macenwolf, either Encounter is fine.
  2. Compiled Extension This should auto-fill to WL6 once the Base Data Folder is filled. If not, make sure it is set to WL6.
  3. Output Folder Choose an empty folder, this is where your published game will go.
  4. Default Palette MacenWolf uses a different palette to traditional Wolfenstein 3D. This file is included in copies of MacenWolf, and this field needs to be pointed to it.
  5. Map Data File MacenWolf comes with Map Definition files for both WDC and ChaosEdit, to match the walls and objects included in the game. You will want to point this field to the WDC definitions file located in your copy of MacenWolf (\definitions\WDC\mac.wdc)

My Project Information for instance, looks like this:

MacenWolf Project Information

Provided you have pointed everything appropriately, clicking OK should bring you into the Editor. You may get a warning regarding the resolution of sprites. Make sure to toggle the option in Project Information→Other Options that tells WDC you are working with 128x128 sprites (High-resolution).

128128

Now, you should have everything you need to edit maps and compile your own project for MacenWolf!

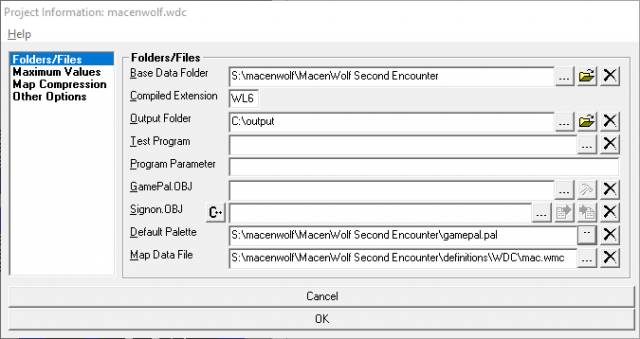
When making a new MacenWolf project, you will most likely need to make a copy of the GAMEDICT.WL6 file that comes with the download of "core" MacenWolf to include in your published files.

This file contains many variables read by the engine to know how to handle the game files. The file includes everything from par times and music, to episode titles and level structure, all able to be edited from any text editor. The file is very well annotated, so it's worth reading through to see all the options on offer.

For most projects though, there's a few specific variables to pay attention to. These are all at the top of the file, because MacenWolf was built to be convenient.

Compatibility Flag

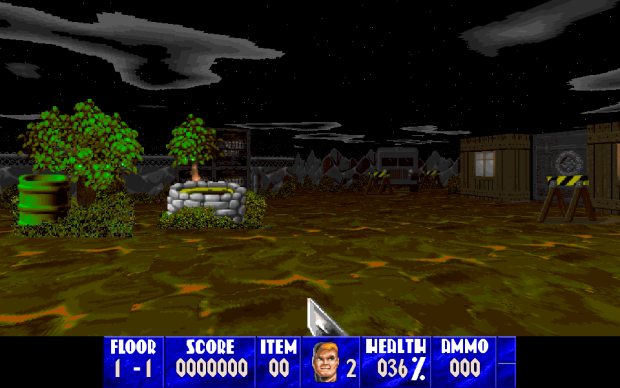
The Mac version of Wolf3D was originally released in several forms, with most mods and custom scenarios being Wolfenstein: The Second Encounter and Wolfenstein: The Third Encounter (And of course, many built on the demo Wolfenstein 3D: The First Encounter). There were several engine differences between The Second Encounter and The Third Encounter, and these are toggled between by commenting and uncommenting the variable:

//3rdenc

To enable the variable, simply remove the two slashes (This uncomments the line).

As noted in the "Modding Reference" text file included with MacenWolf, The Third Encounter has the following quirks, which will be enabled in your project if the variable is uncommented:

  • Shorter knife distance
  • No vacuum spot trick (In The Second Encounter, when you push a pushwall and stand around in the spot where the wall used to be, enemies cannot attack you)
  • Enemies can't open locked doors
  • Knife displays 0 ammo
  • Objects don't block projectiles, besides the cage and column block
  • Red frame in difficulty menu
  • 40,000 points needed for an extra life (Commented, it is only 20,000 points)
  • The point at which BJ's face becomes damaged (50% uncommented, 25% commented)
  • Map limits with the compatibility option enabled: Uncommented, 400 guards, 64 visible objects. Commented, 127 guards with 200 objects.

Episode Names, Starts/Ends, and Secret Levels

MacenWolf is designed to be flexible in how an author structures their scenarios, and uses variables from these next sections to manage that.

The first is episode names. Each episode planned in a project (Up to 12) should have it's own line.

Here's an example of the section in a project containing three episodes:

// ========== EPISODE NAMES 
// Rather self-explanatory. You can have up to 12 episodes/scenarios per game
episode1 "EPISODE NAME 1"
episode2 "EPISODE NAME 2"
episode3 "EPISODE NAME 3"

The game will read this information, and know there are three episodes as well as what to name them.

The next section tells MacenWolf when each episode starts, and which maps end an episode. This is important, otherwise MacenWolf will keep trying to play extra maps after finishing the final map in the planned project (Or, end prematurely).

The starts of episodes are determined using the startepisode* variable, with the * replaced by the episode number.
The finalmap variable tells MacenWolf which maps contain elevators that will "end" the game. Unlike startepisode*, finalmap does not require information about an episode.

Using the same example of a three episode game, we'll say each episode is 5 levels long (Ignoring secret levels for now). So the game will start Episode 1 on map 1, and end on Map 5, Episode 2 will start on Map 6 and end on Map 10, and so on.

// ========== EPISODE STARTS/ENDS 
// Specify the starting map for each episode/scenario in 
// your mod. You can have as many final maps as you like 
// and they're not tied to any specific episode, to accomodate 
// for certain rare episode flow decisions 
startepisode1 1 
startepisode2 6 
startepisode3 11 

finalmap 5 // the final map for Episode 1 
finalmap 10 // the final map for Episode 2 
finalmap 15 // the final map for Episode 3

If the planned project has secret levels, there's one more section to fill out. In this section, using the secretlevel* variable will tell the game that if there is a Secret Elevator present on the specified map (Which replaces the *), to send the player to the designated secret level.

In the example project, Episode 1 and Episode 3 will each have a secret level, which will be maps 16 and 17.
The secret level in Episode 1 will be found on Map 1, and will take the player back to Map 2 when it is finished.
Episode 3, however, will have a secret elevator on it's second level (Which is Map 12 in the project), and if completed will skip the player all the way to the final level of the episode, Map 15. So, the section below the STARTS/ENDS section will look as follows:

// ========== SECRET LEVELS 
// Any map can have a secret (alternate) exit, so for example secretlevel1 10 
// sends you from E1M1 to E1M10 and secretlevel10 2 sends you from E1M10 back to E1M2

secretlevel1 16  // The first secret elevator is on E1M1, and takes you to M16 
secretlevel12 17 // The second secret elevator is on E3M2, and will take you to M17 

secretlevel16 2  // Taking the secret elevator on M16 will take you back to E1M2, allowing you to
                 //continue on with the Episode. 
secretlevel17 15 // Taking the secret elevator on M17 will skip you through the game and take you
                 // straight to the final boss of Episode 3 at E3M5, which is the 15th map in the project.

The above sections are the main elements that should be edited when creating a project in MacenWolf, to ensure the game will play out as you have planned.

There are many other elements and features that can be activated and changed within the GAMEDICT.WL6 file, and it is worth taking a look at the options on offer.

To further customize a project, MacenWolf allows authors to include extra image files to customize the look of the menus when a player runs their game.

A project may have it's own thumbnails associated with it's episodes. To do so, the author simply has to include a .BMP image (96x64px in size) in their project called episode*.bmp, with the * replaced with the number of the episode. When MacenWolf runs the project, it will see these files and use them instead of the included defaults.

Episode 1 Thumbnail

The same can also be done with the menu layouts for the Episode/Scenario Select Screen (episodeframe.bmp and episode.bmp), and the Difficulty Select Screen (difficulty.bmp). Copy each file into your project's subfolder and edit to create your own custom menu backgrounds for your project.

Episode Select

You've created your maps, made some custom episode graphics, and you're ready to release your mod to the public! There's a few things you should keep in mind when doing so.

MacenWolf is built so that most mods and games built on it can be played utilizing the one copy of the engine. To do so, the game allows customized files to be stored in subfolders inside the game directory which are then started using commands in individual BAT files.

When releasing your game following this standard ensures that things are kept consistent, easy and simple for the end user who wants to play your game.

1. Place your project files in their own folder.

Any edited files necessary to your project should go in this folder, which should be given a simple name. This includes your edited map files (GAMEMAPS.WL6, MAPHEAD.WL6) and the GAMEDICT.WL6 file edited with the information needed for the game.

Should your project go further and edit the sprites and textures in VSWAP.WL6, or any of the other files of the game, include those in the folder as well. If your project has other edited elements (Such as episode*.bmp files), they will also need to be in this folder.

2. Create a BAT file

The BAT file is the file that will tell MacenWolf to run the modded project instead of the core files.

To create one, simply start a new text document containing only the following line:

macenwolf --file modfoldername

Change modfoldername to the name of the actual folder the modded files are in.
Save the text file's name and extension to MODNAME.BAT, replacing MODNAME with the name of your project for convenience.

Assuming the folder containing your main copy of MacenWolf is located at C:\MacenWolf, the player will be able to run MODNAME.BAT from within that folder, which will start the game, but use the files in the subfolder specified (In the above example, it would run any files in C:\MacenWolf\modfoldername).

Test the BAT file to make sure it works (Ensure your mod is in it's subfolder within the MacenWolf folder), and if so, success!

3. Zip your files

When publishing your project, you only need to include your BAT file, and the folder containing your edited and modded files. When looking inside your zipped project, it should appear as follows (with variation depending on program used):

Zip Structure